Tag: Hardware

Samyang 24 mm f 1.4 review

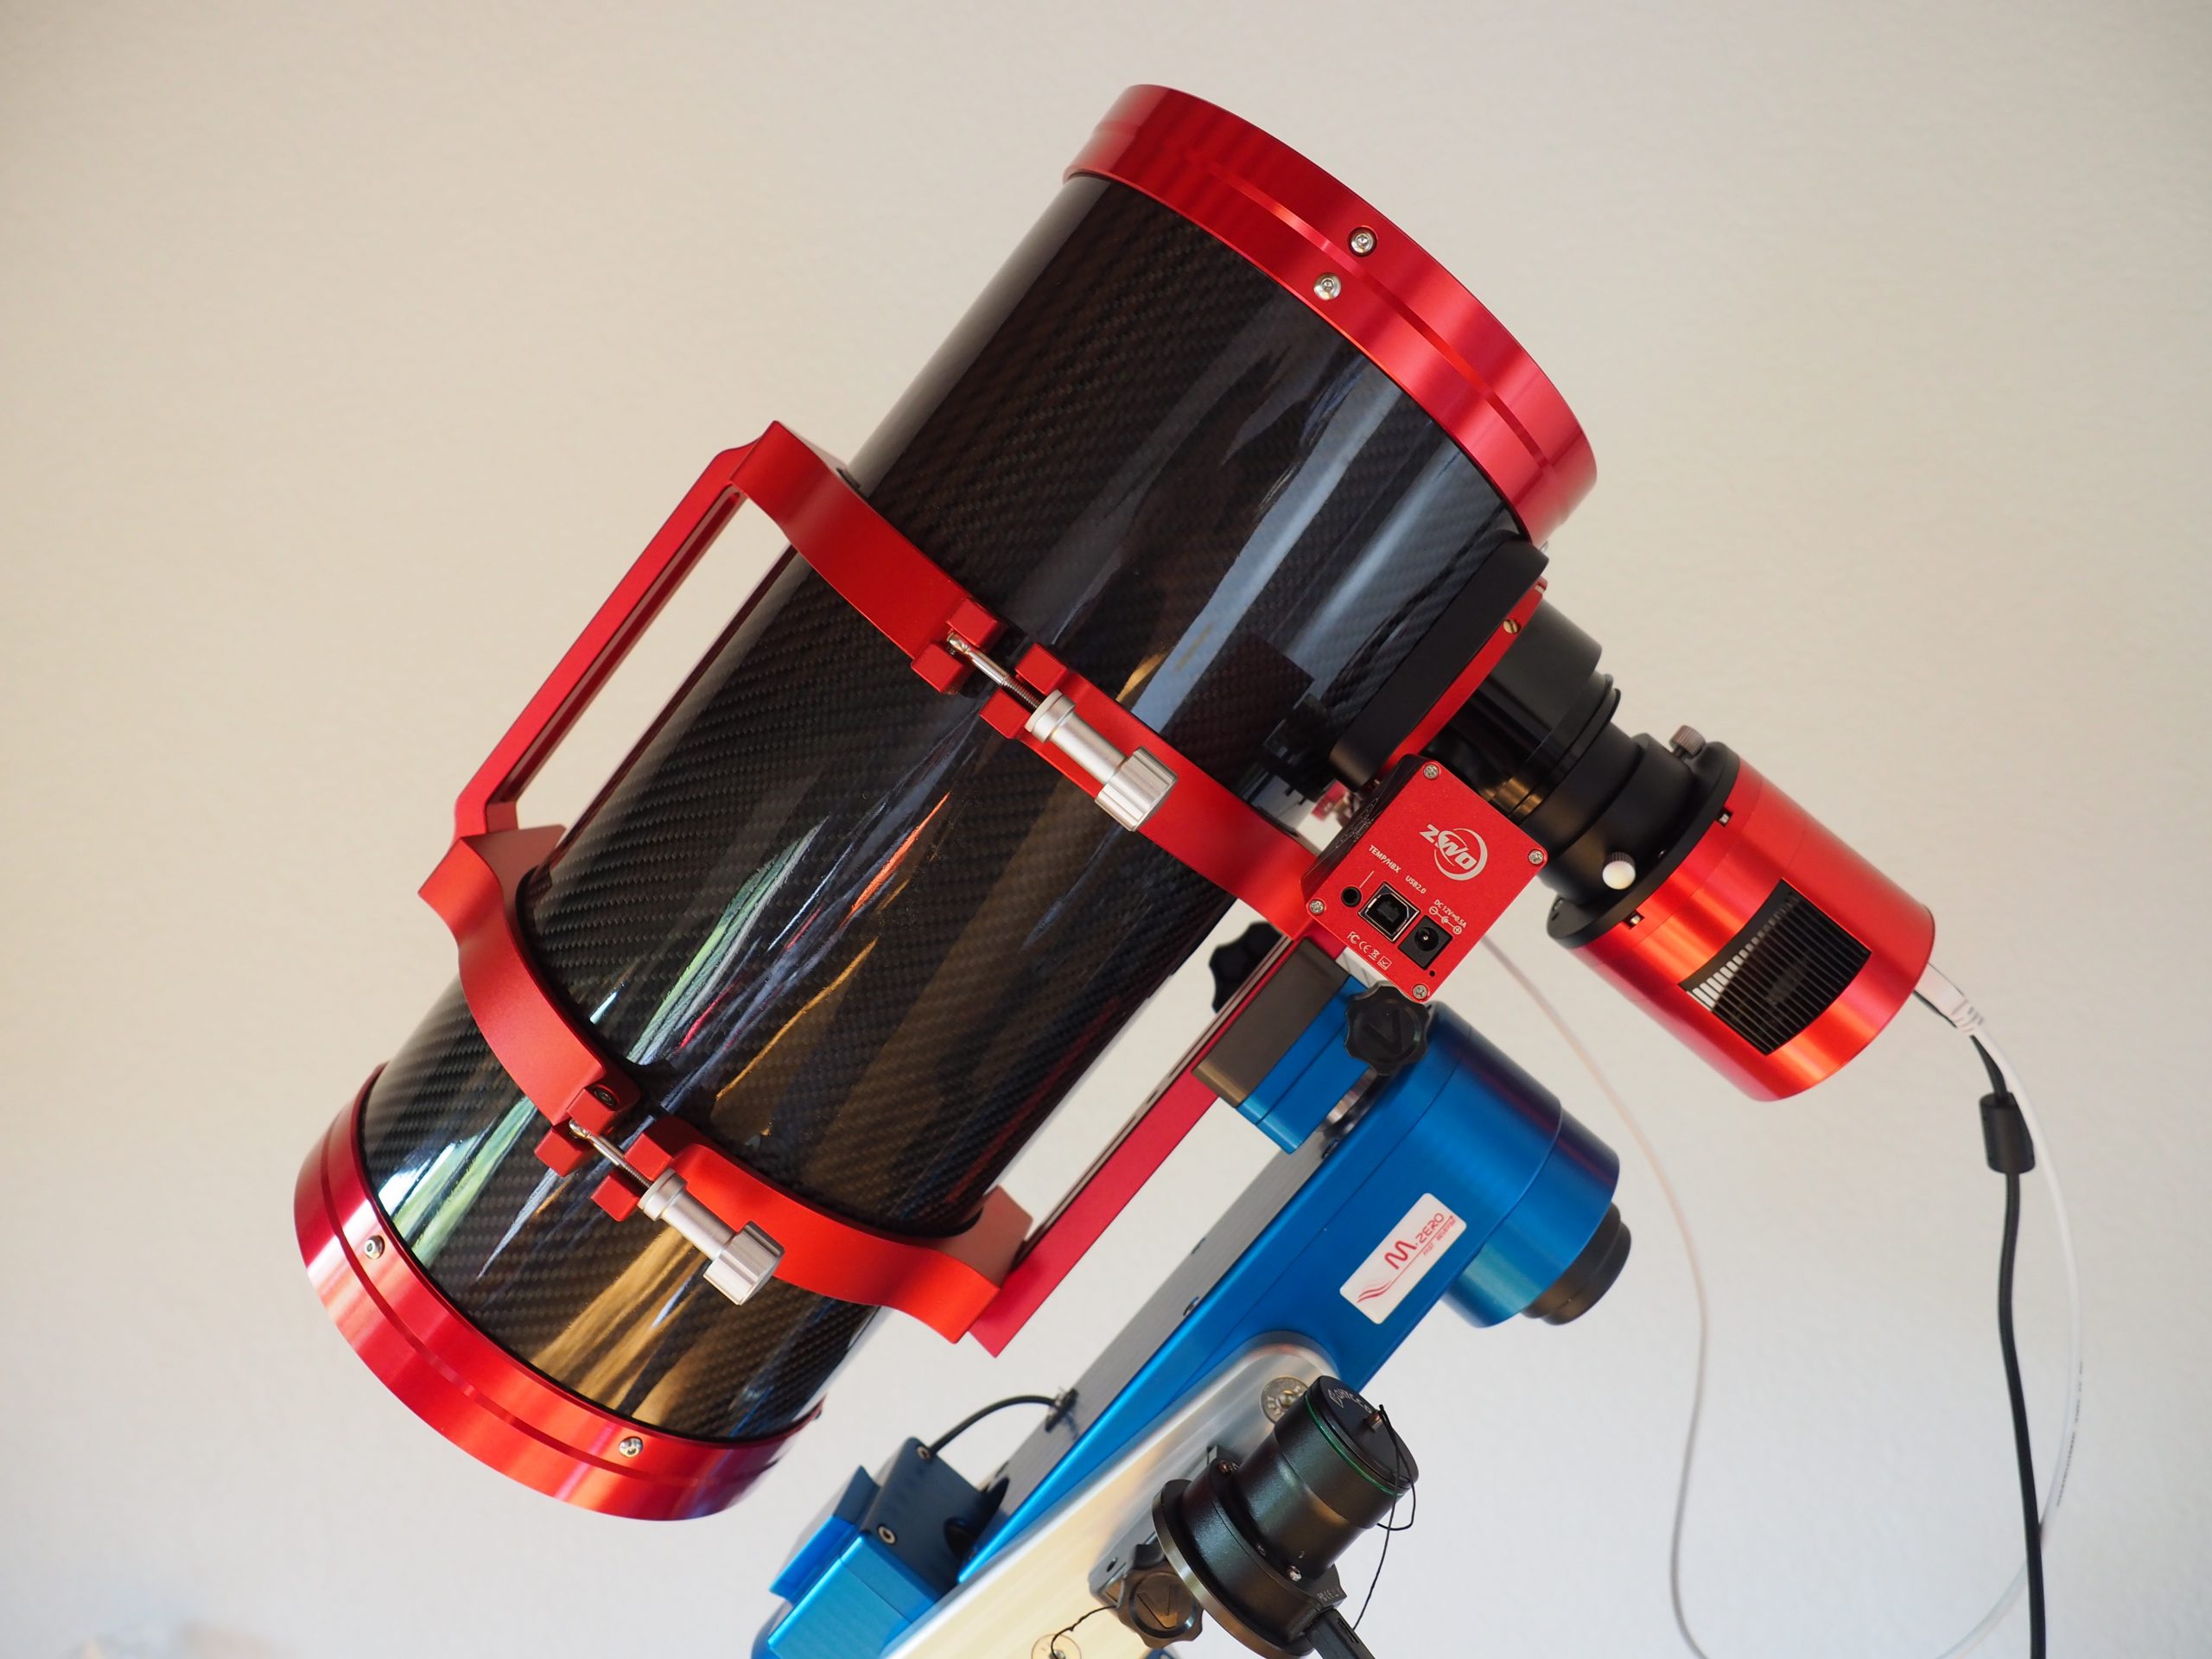
I have been searching for a wide lens for my recently astro-modified, second-hand Canon 6D. This means the lens should be suitable for a full-frame sensor 36 x 24 mm. The requirements on lenses are very tough for astrophotography because you photograph the stars – pinpoint sources of light. The design/manufacturing flaws of the lenses are revealed on every astrophoto and optical aberrations spoil the good shot. Astrophotography of the Milky Way needs a lot of effort. Specifically, you have to travel to reach the dark sky and if you do so, you want to make nice pictures. In my opinion, the lens is the most important piece of equipment for astrophotography, because nowadays you can buy second-hand Canon 6D, which is still very good and relatively inexpensive.

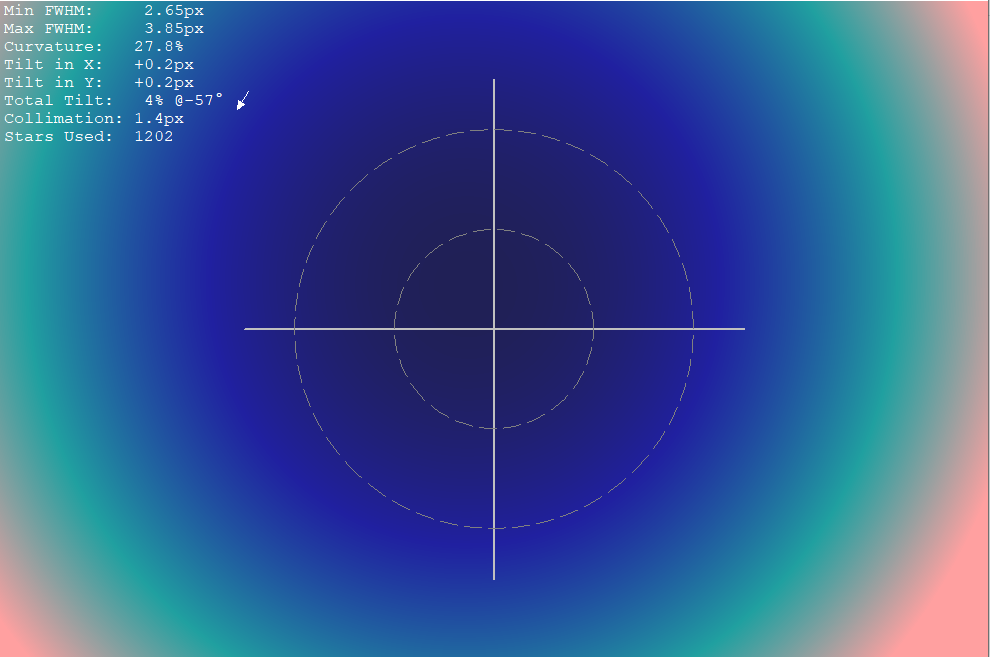
All the lenses are very sharp and aberration-free in the center of the picture, but the more you go off the axis, the aberrations start to pop up. There are many kinds of optical aberrations. A very nice article about the most common aberrations is on Lonely Speck.

Last year I purchased Samyang 14 mm f2.8, which is a great lens for the money, but the corners are not perfect and the stars are strongly deformed in every corner. I assumed that almost twice more expensive Samyang 24 mm f1.4 will perform much better and I also assumed that it’s easier to make a 24 mm lens compared to 14 mm. Moreover, f1.4 is a brilliant convincing argument. On the other hand, Samyang 24 mm doesn’t communicate with the camera, which means no EXIF of aperture and manual focus. This makes the lens a one-trick pony, suitable mainly for astrophotography and not that practical for regular photography.

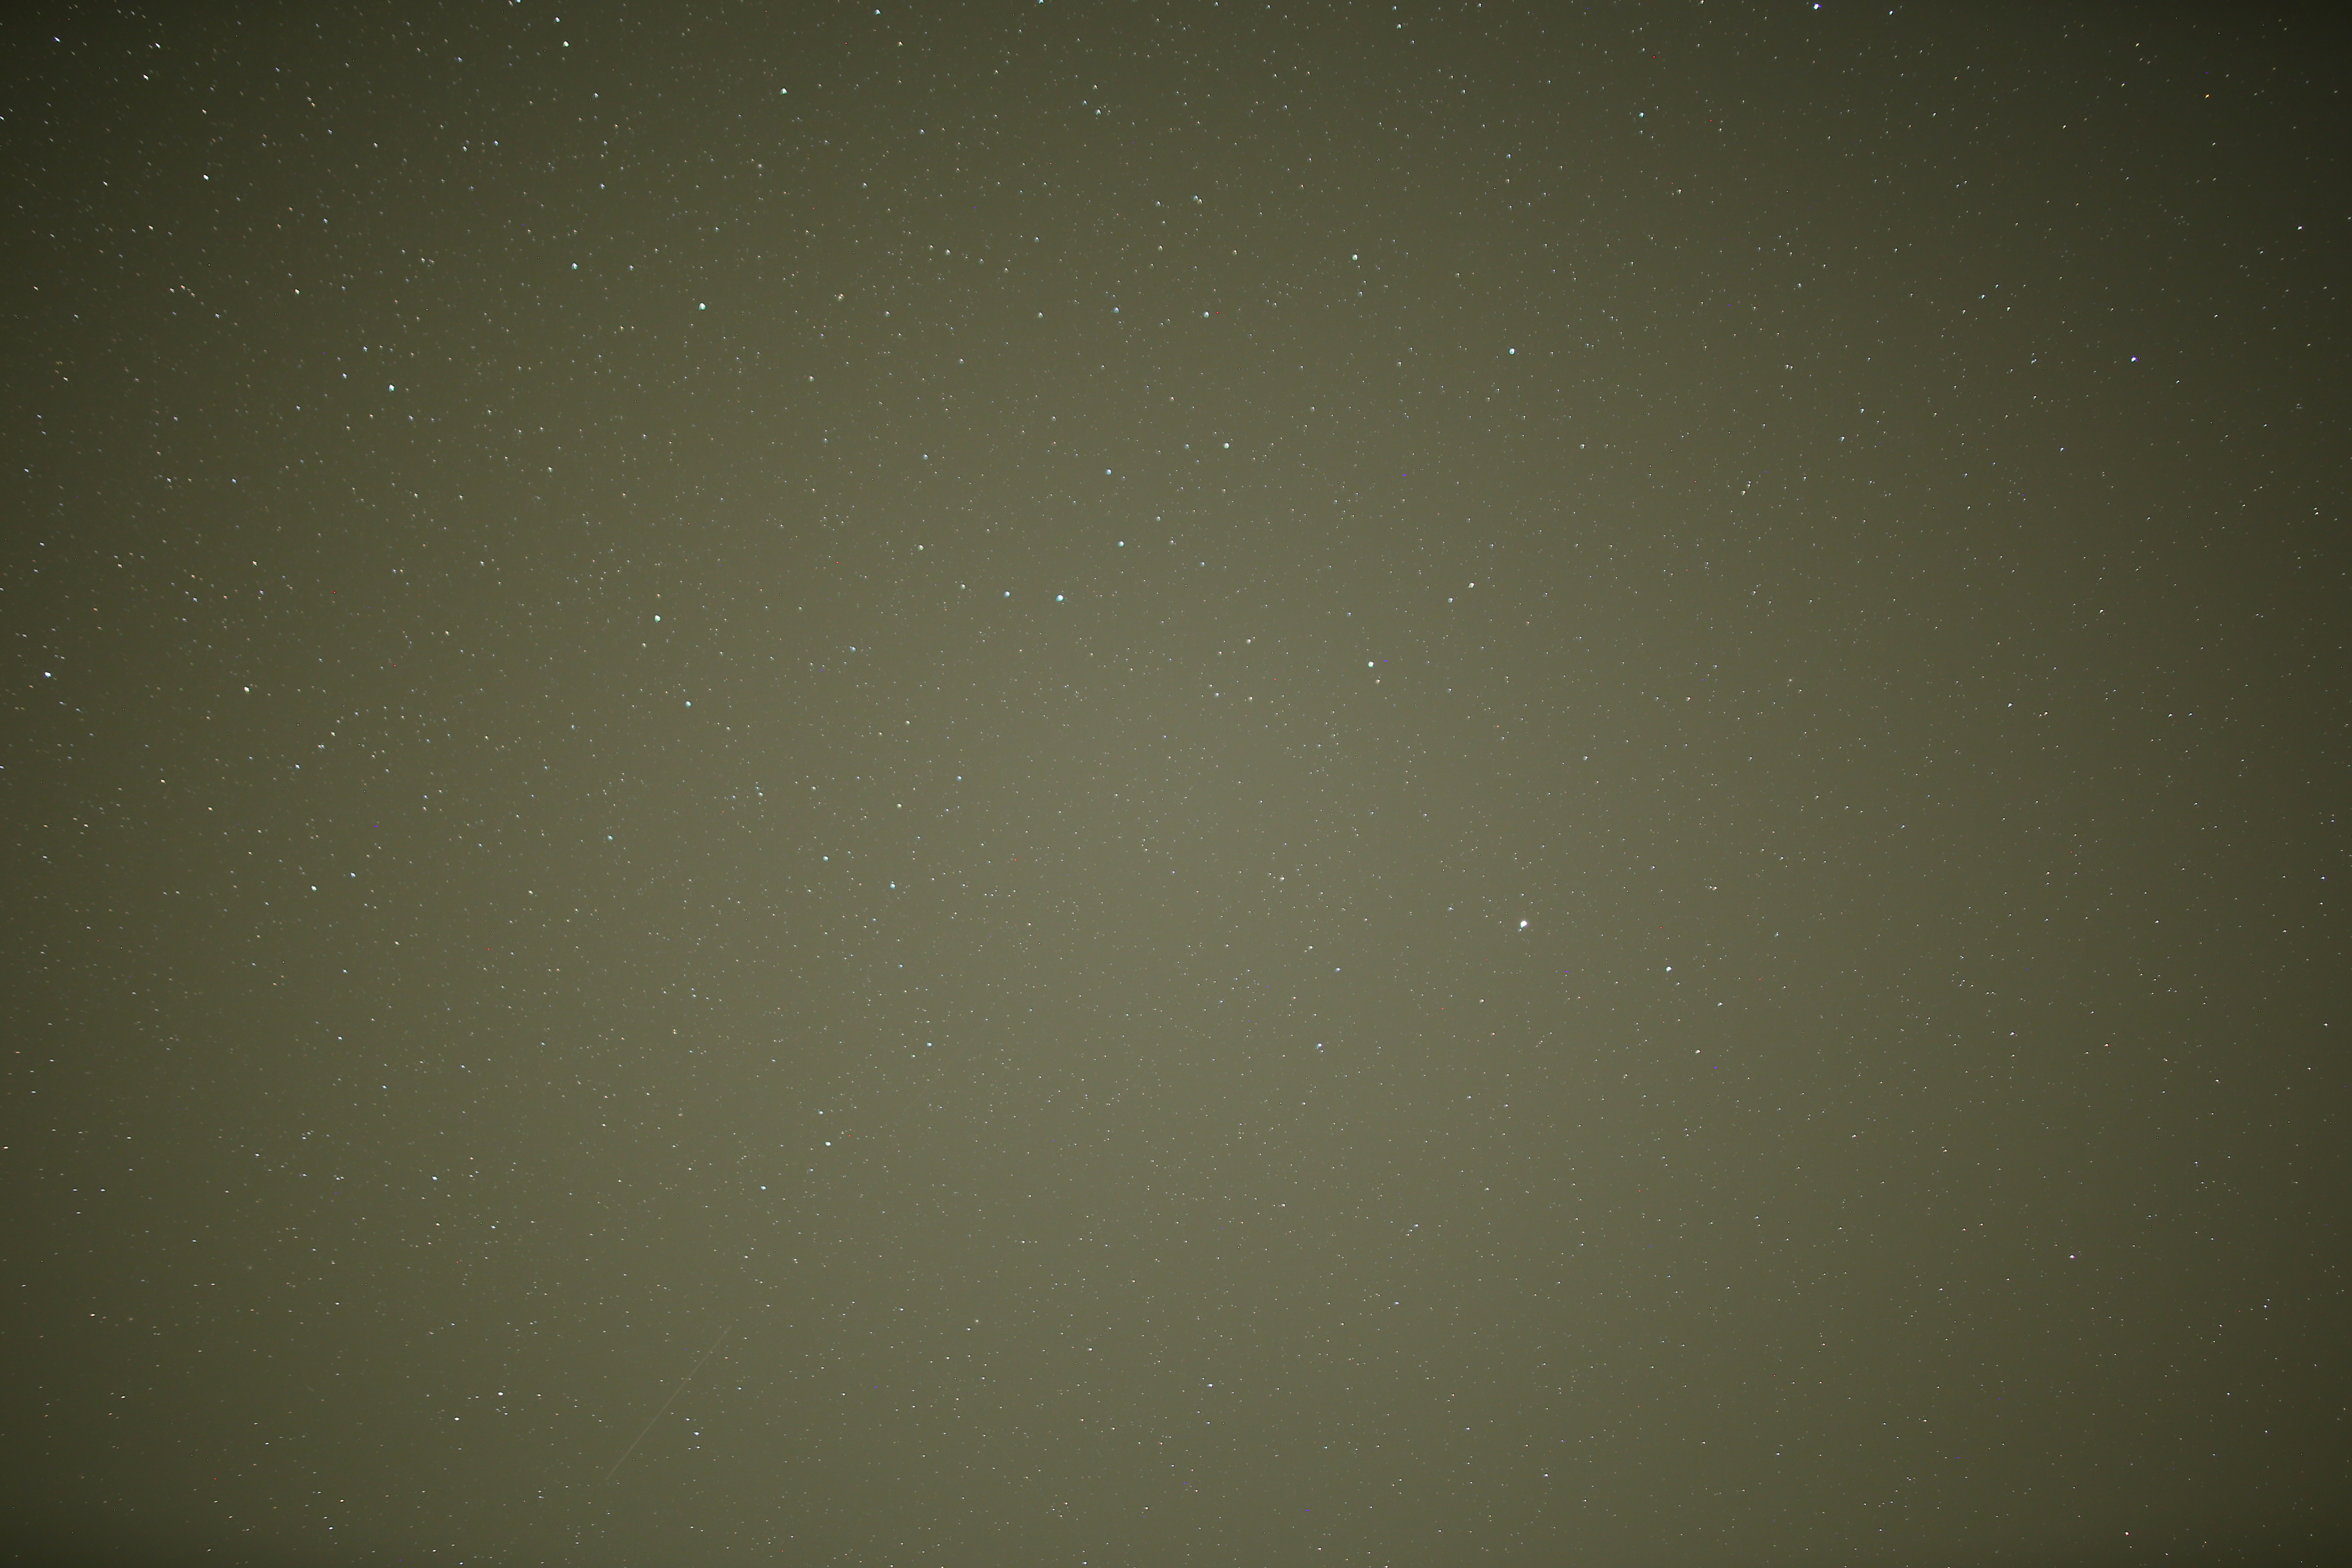
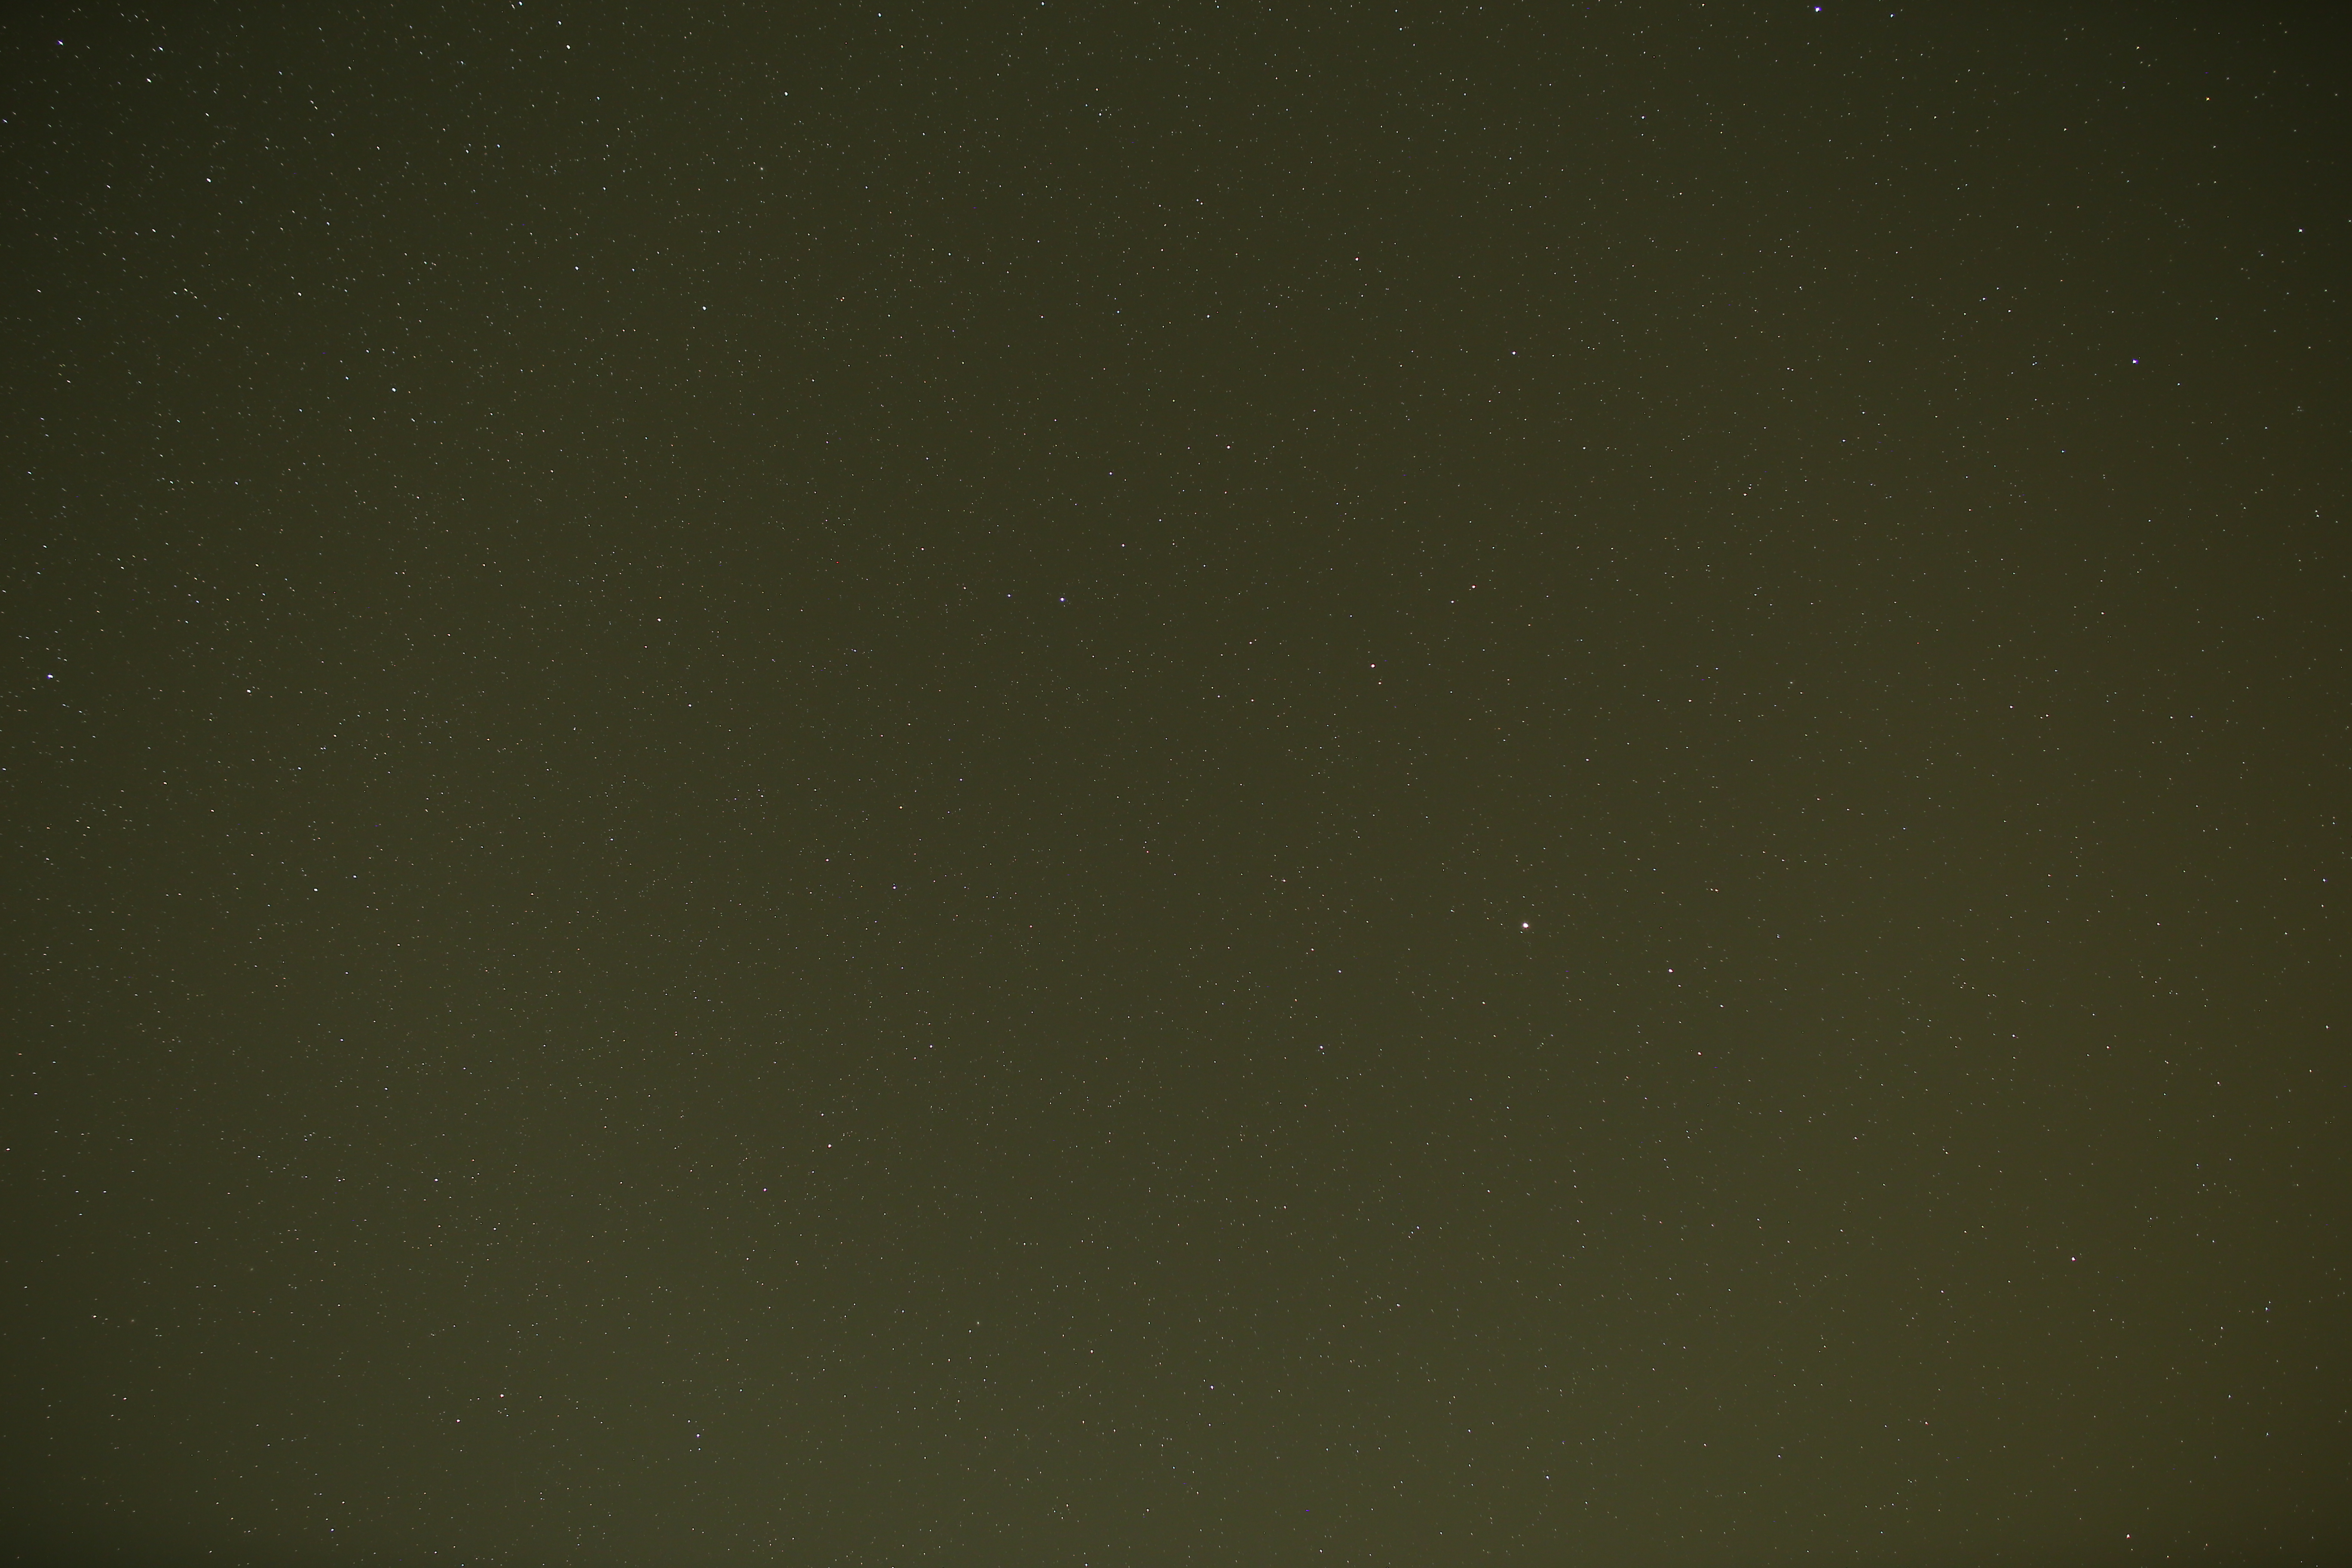
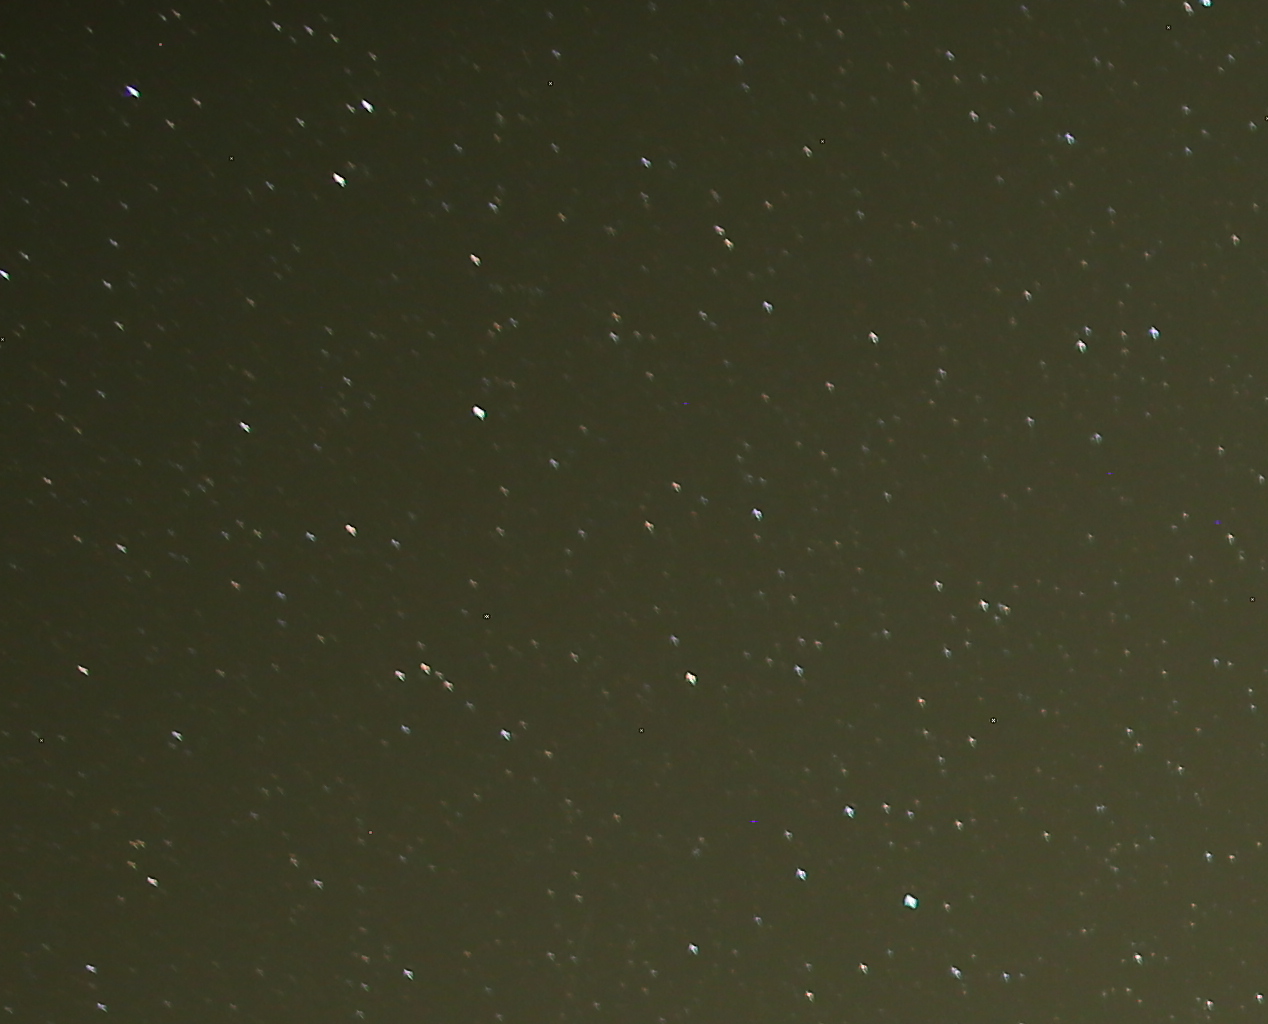
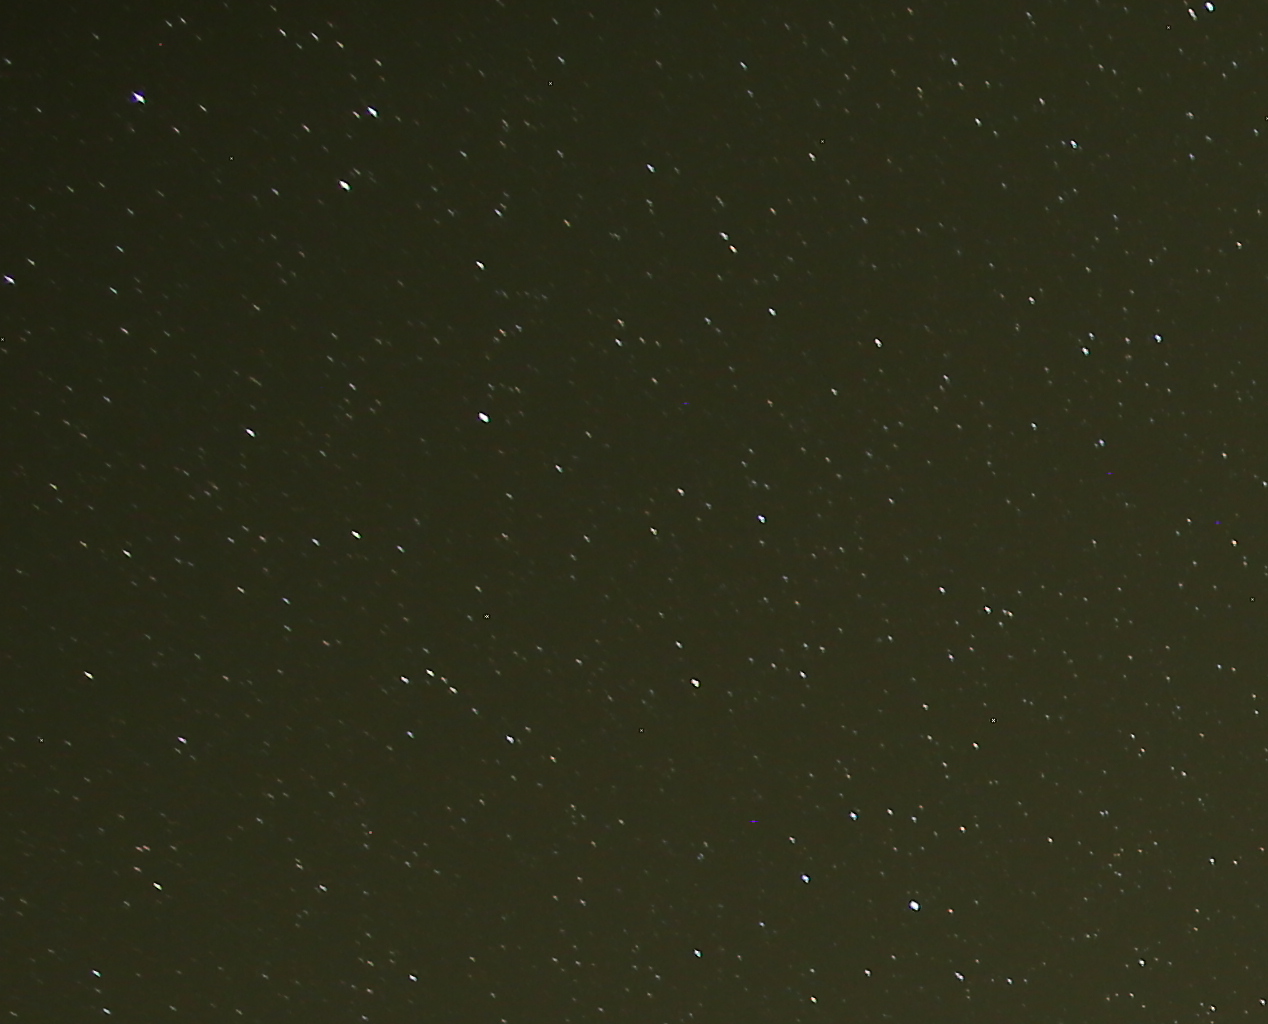
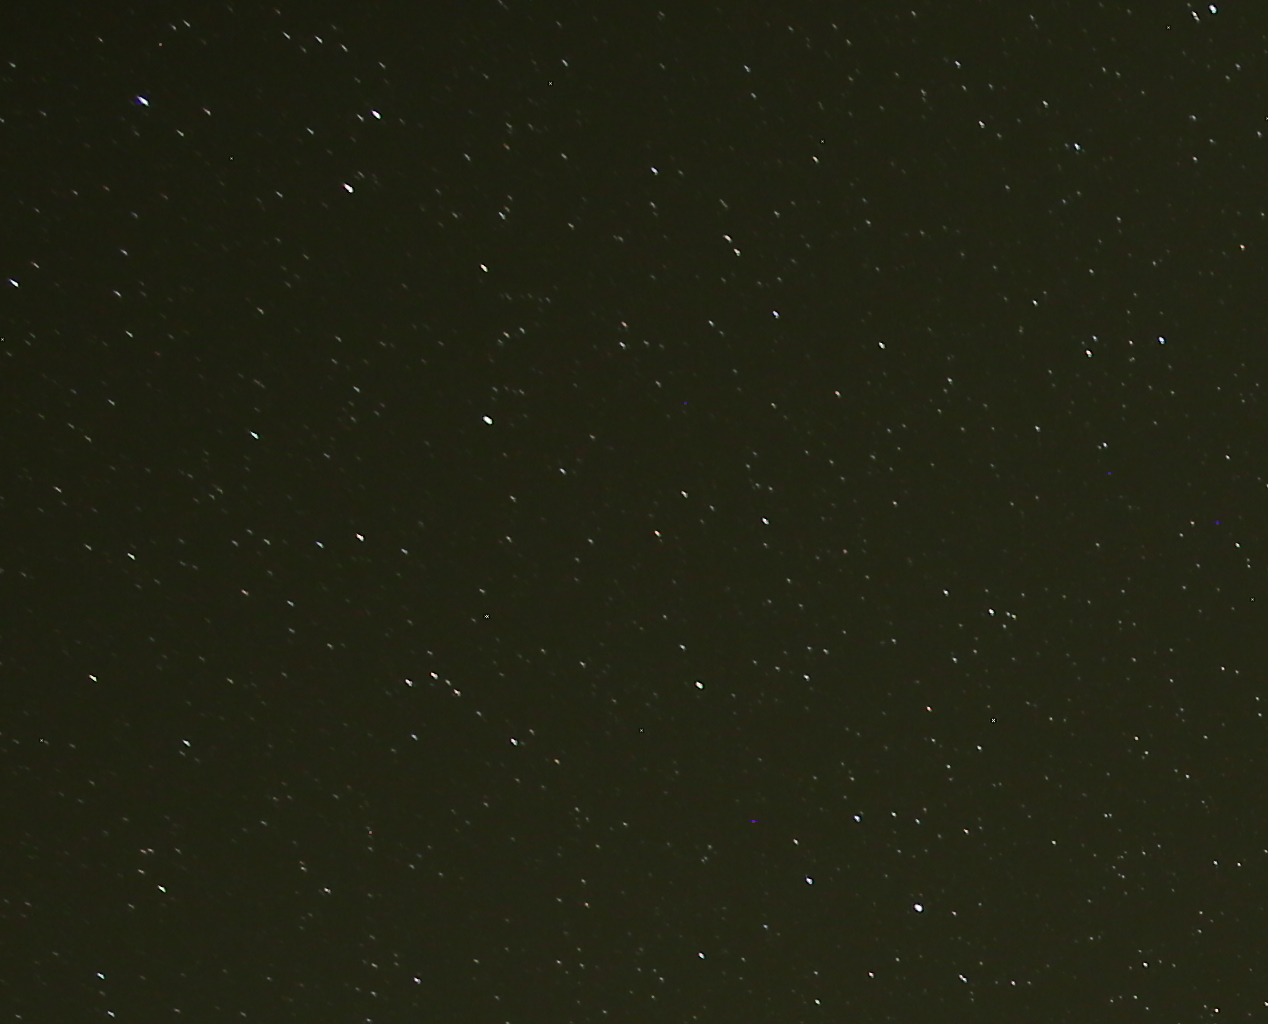
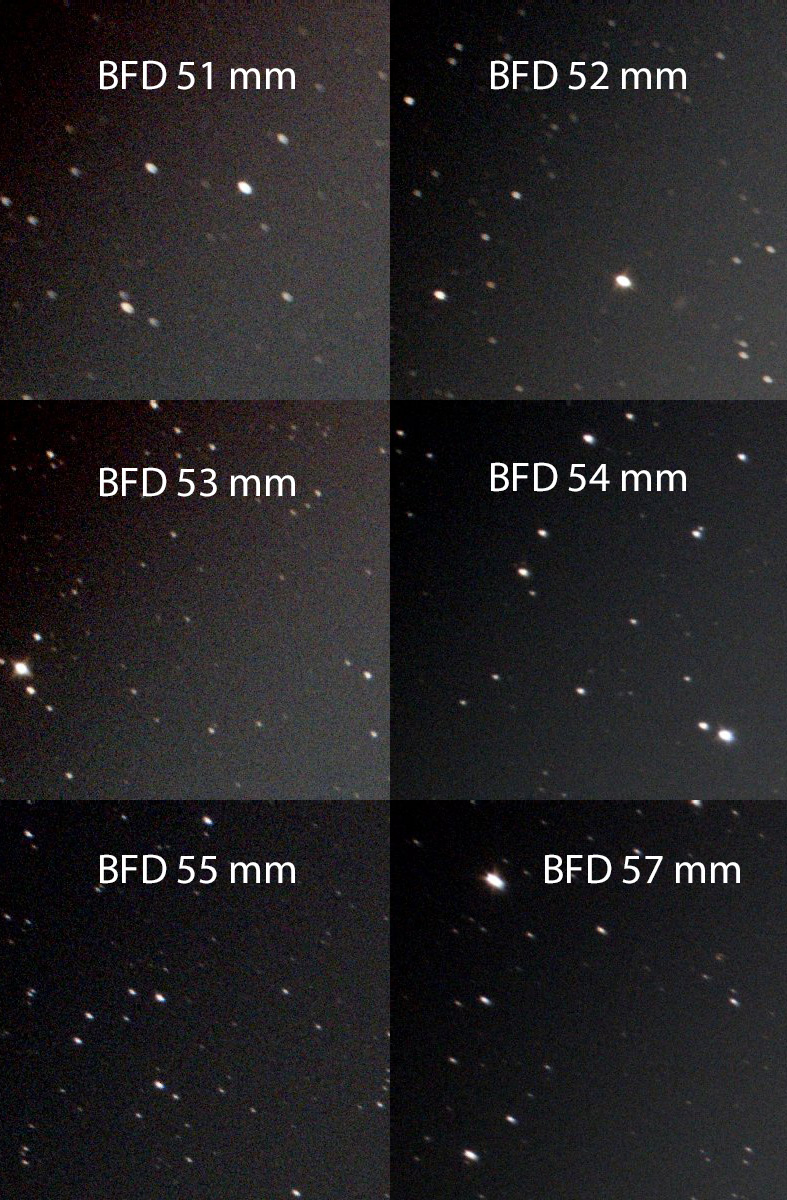
Before I take this lens to the dark site, I decided to test it from my light-polluted home. The equipment: Canon 6Da, Baader Nanotracker, and of course, Samyang 24 mm f1.4. The main aim was to find the best aperture/sharpness ratio. Most of the lenses get sharper if slowed down. So I kept the exposure time 20 s, ISO 800, and was systematically changing the aperture from 1.4 to 2.8.

Here are the results of uncropped and uncorrected (no flats, no bias, no darks, and no noise reduction) pictures:

F1.4

F2.0

F2.4

F2.8

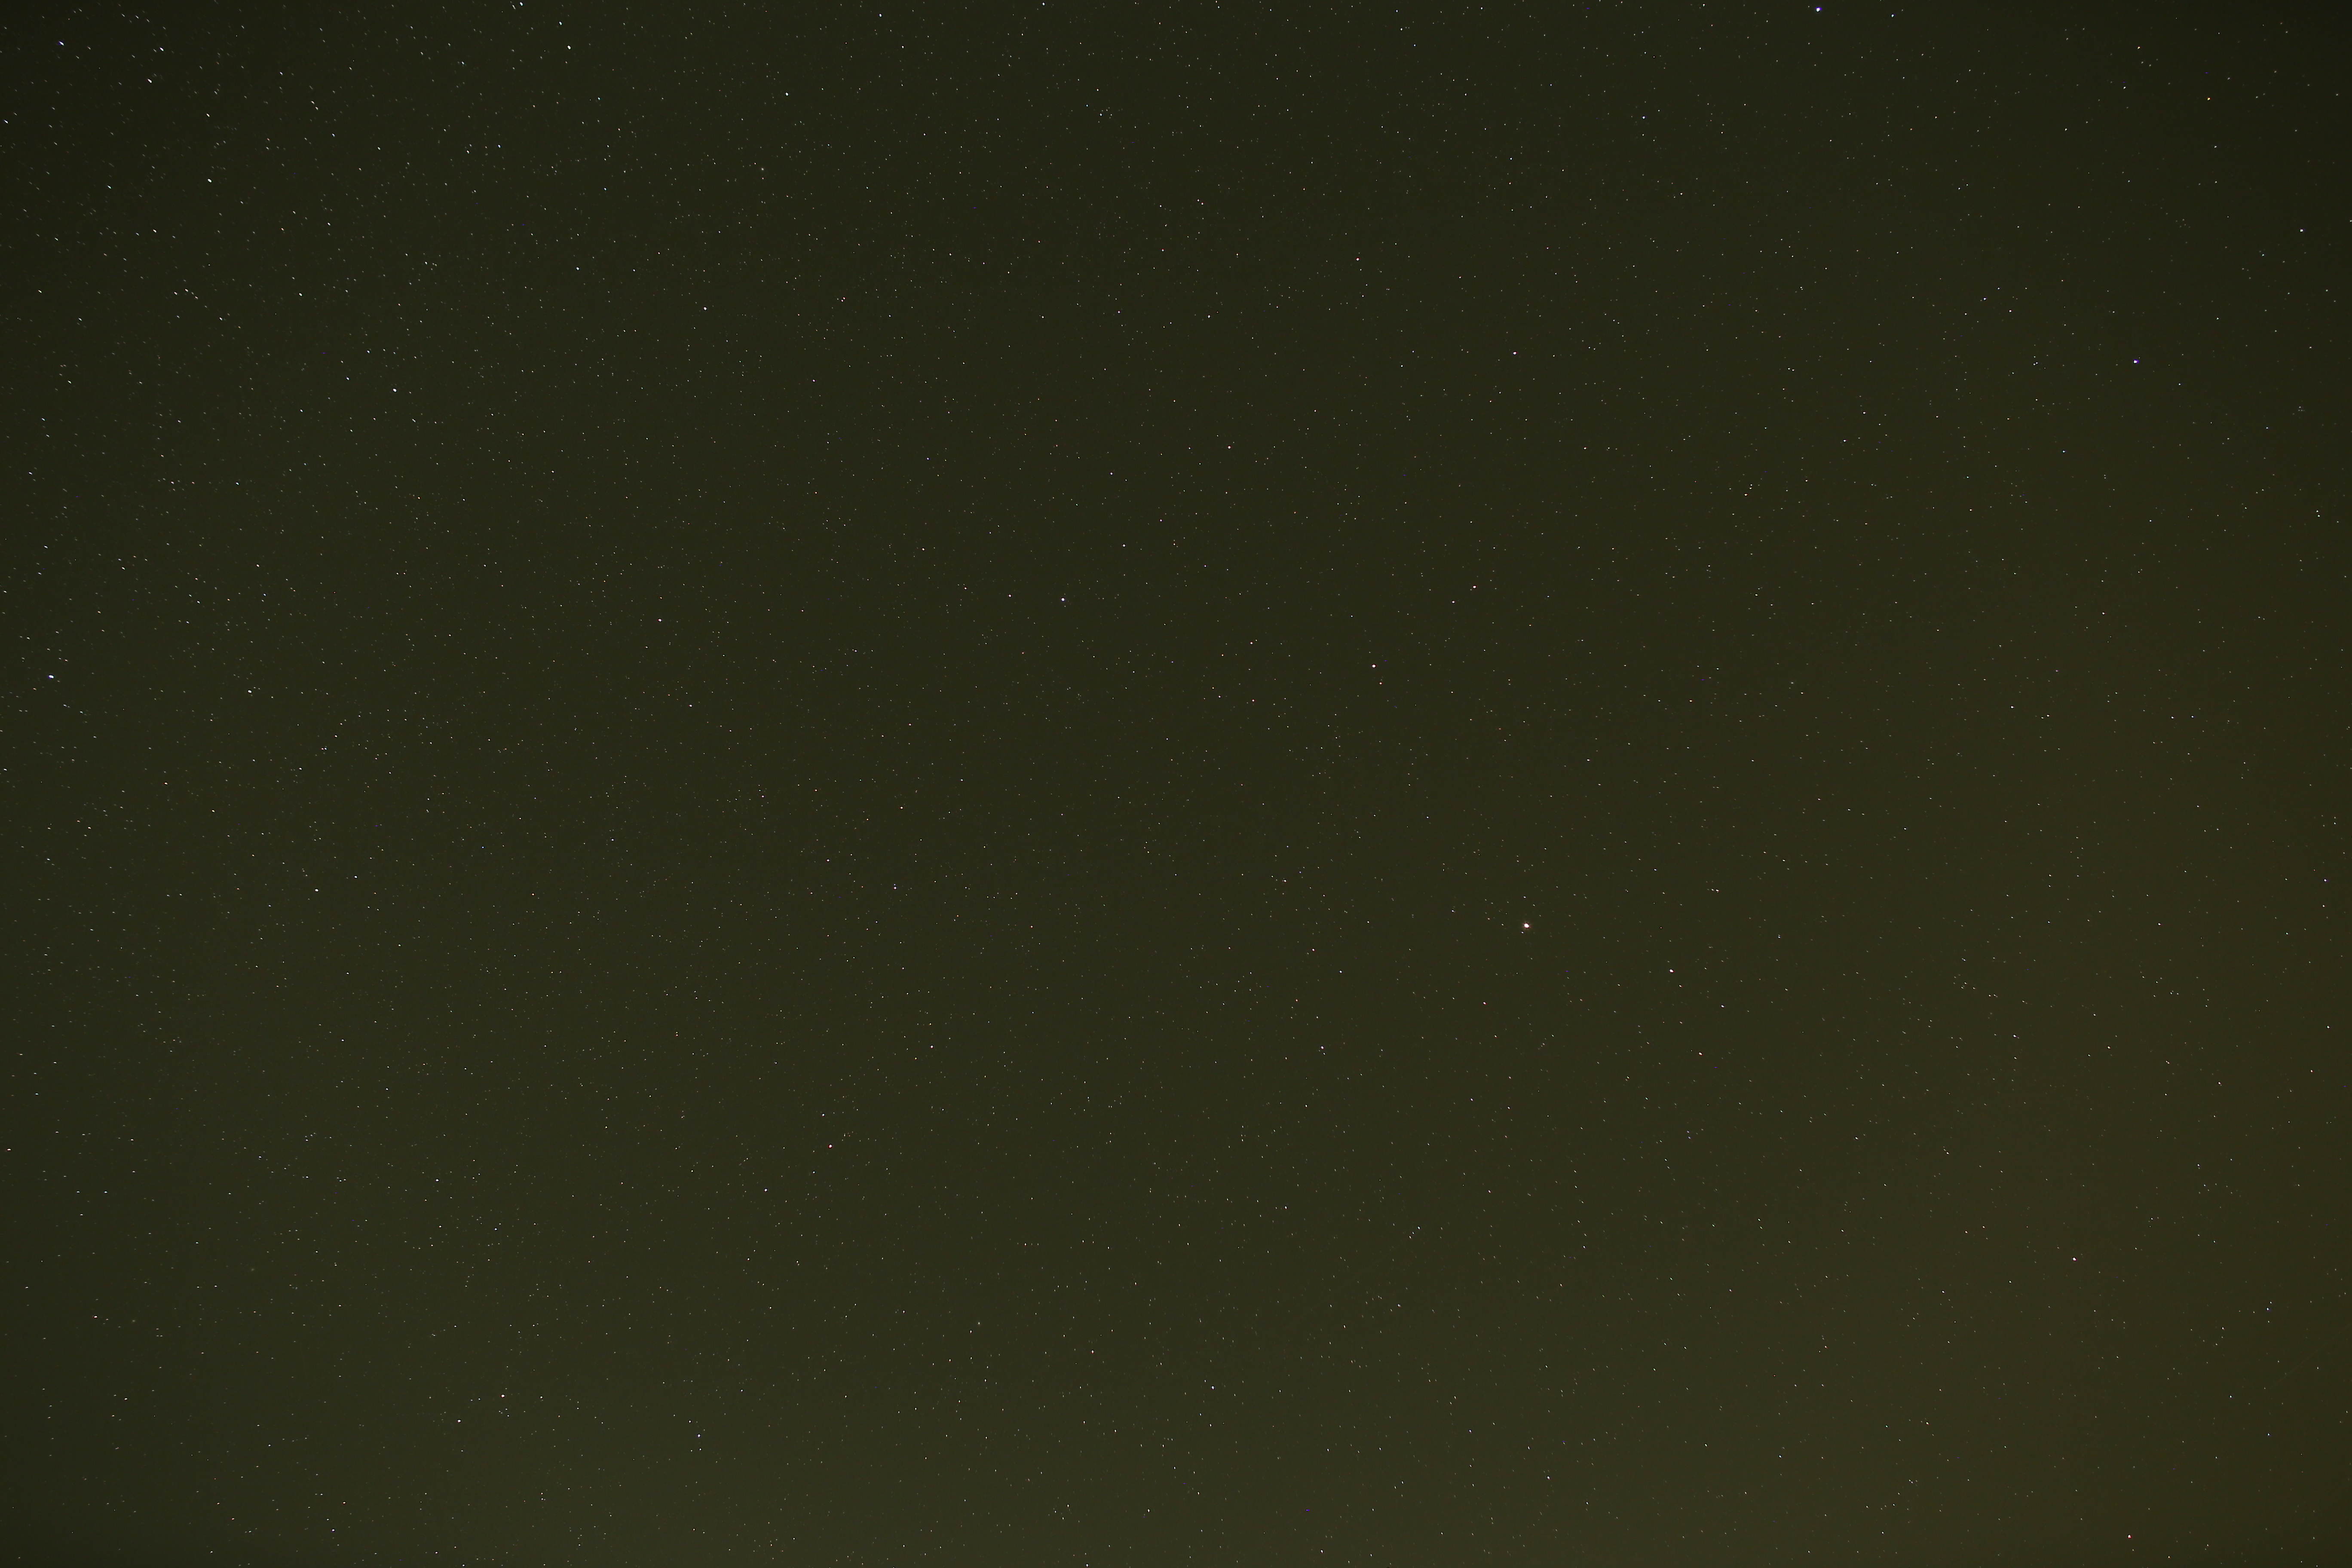
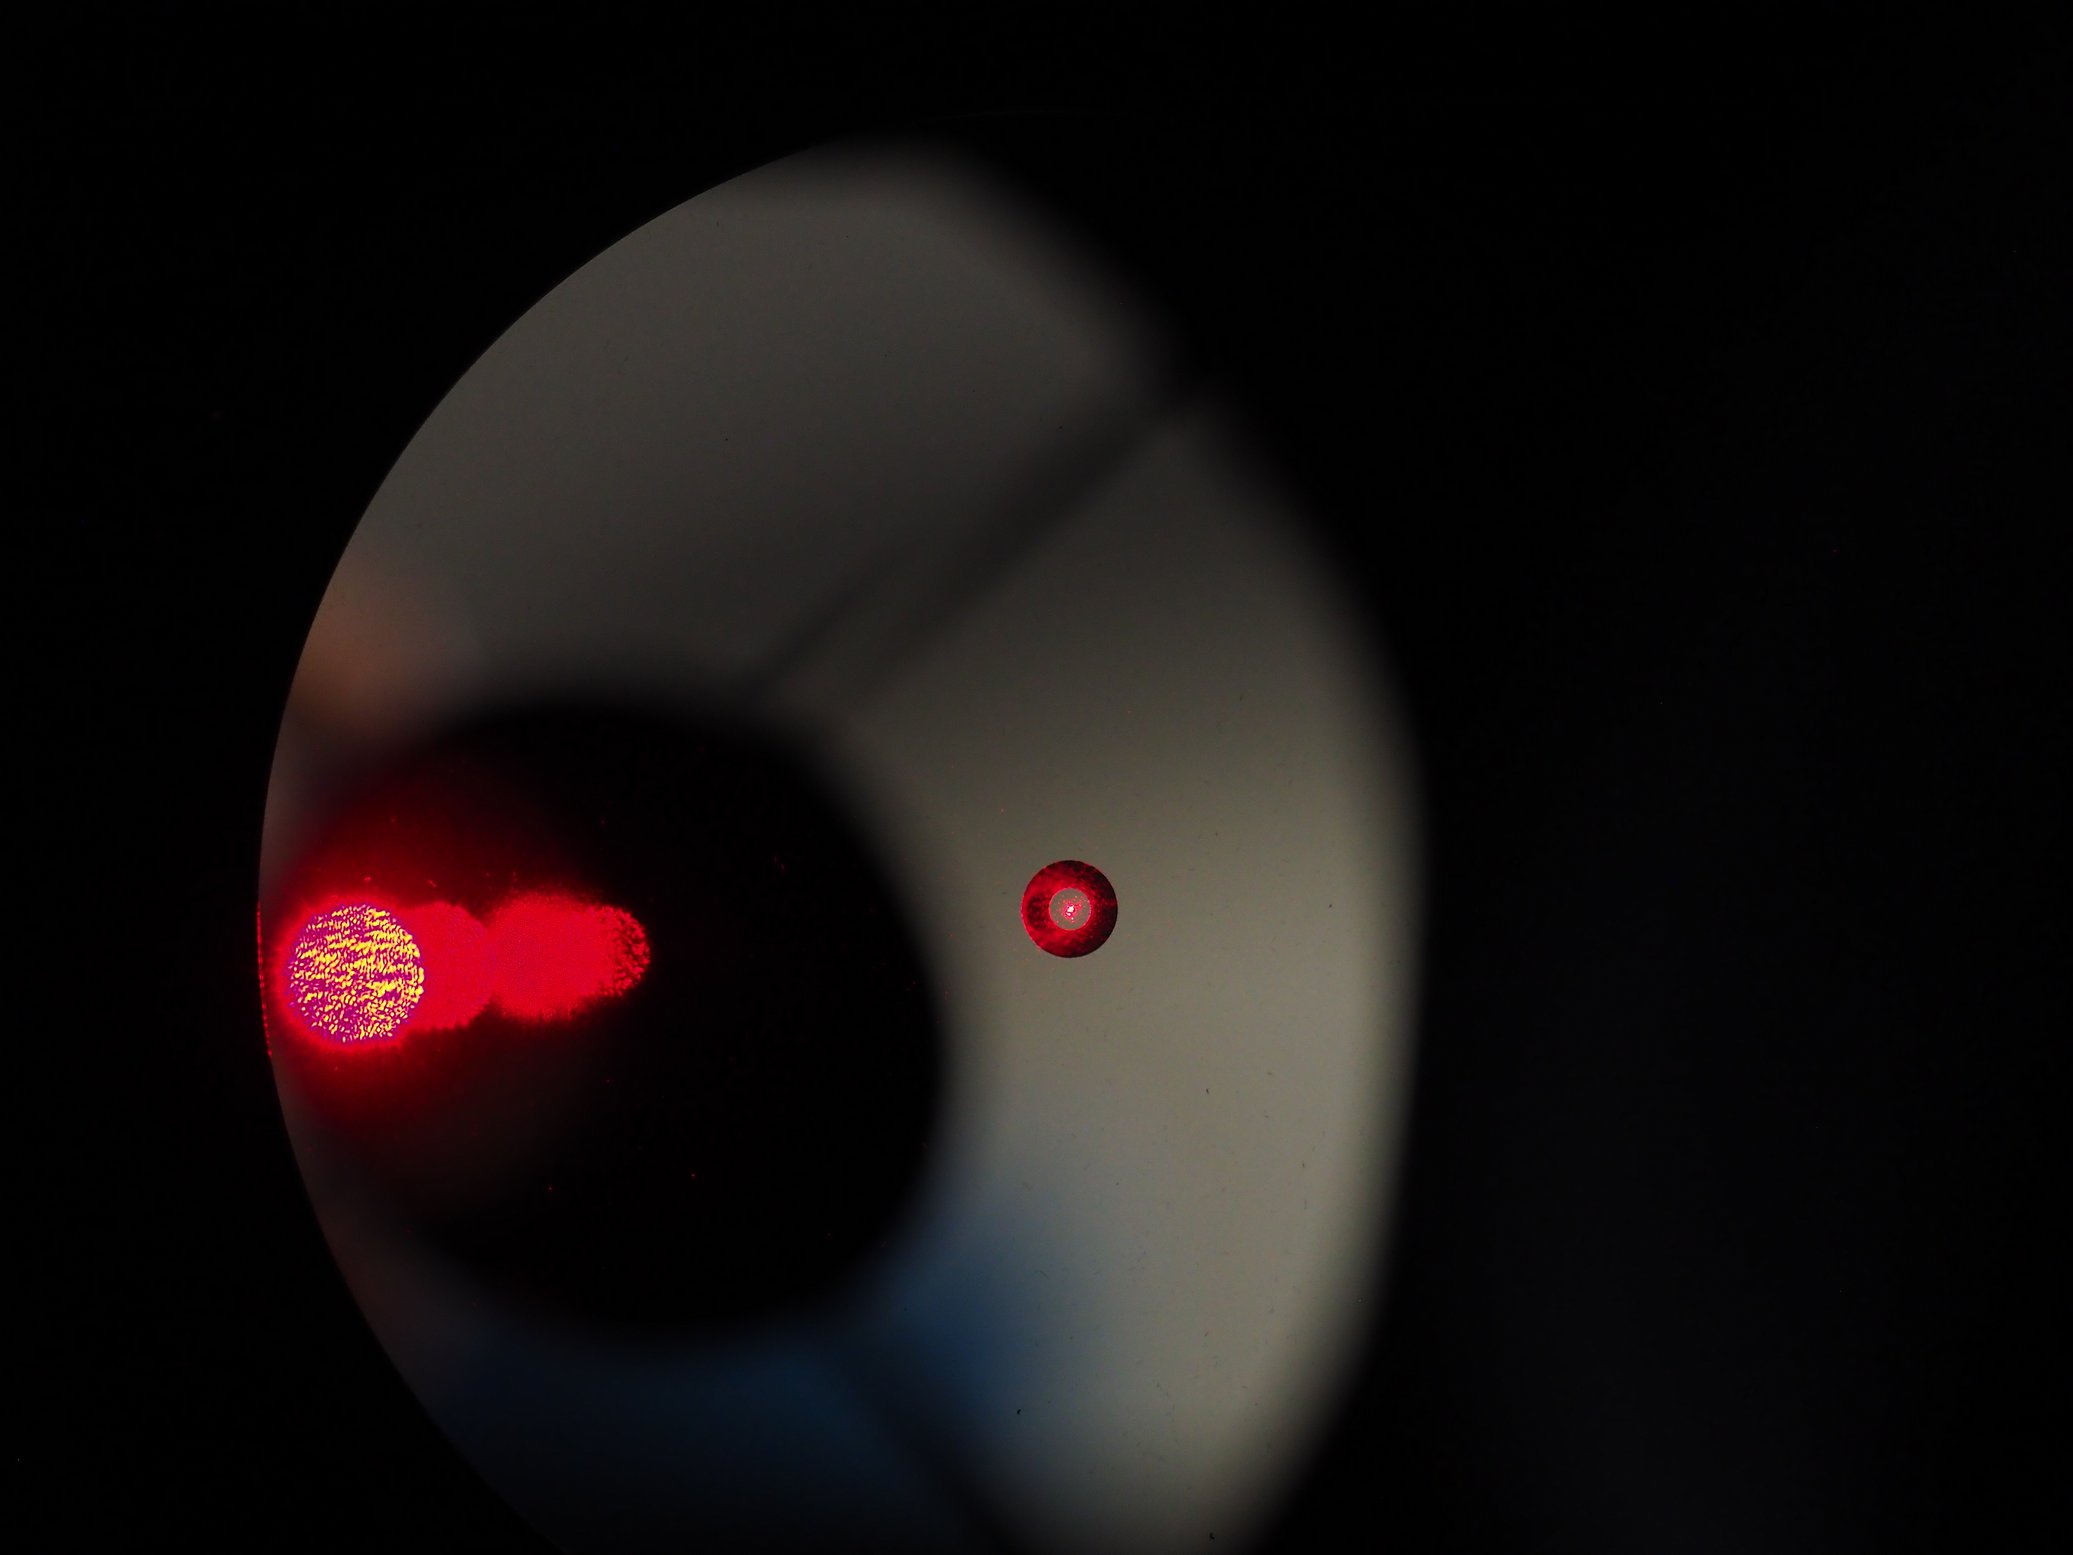
And the winner is…. obviously, the largest aperture (the smallest F number) collects the most of the light, but it vignettes strongly and honestly, the stars are ugly even in the center – this is totally unusable for serious astrophotography. The situation is not much improved by slowing the lens down to F2.0. At F2.4 the situation is significantly improved but at F2.8 the star roundness is acceptable almost everywhere, except the left corners.

Let’s have a look to the upper left corner – there the stars are the worst.

F1.4

F2.0

F2.4

F2.8

Conclusions

Samyang 24 mm F1.4 should be slowed down to at least to F2.4, to offer decent quality of the stars on a full-frame sensor. At F2.8 the quality is even slightly better, but at the top-left corners are the stars still elongated by astigmatic aberration. I expected better star quality, but in the end it’s not so dramatic, because the right side is not perfect, but acceptable. At least I know which side of the camera I should turn towards the ground if making a portrait picture of the Milky Way.


SharpStar 150 mm f/2.8 Hyperbolic Astrograph review

I think that nearly all enthusiastic astrophotographers must have noticed the news about the hottest, portable, fast, affordable telescope from SharpStar. The rumors were spreading in 2019 and when I saw the specifications, this telescope landed on my “must-have” list. The specifications were incredible: F-stop 2.8, carbon tube, solid spider wanes, primary hyperbolic mirror 150 mm in diameter, robust 2.5-inch rack, and pinion focuser, and mainly the corrector, which should be able to correct the coma on the whole full-frame sensor (36×24 mm), WOW! I already had some trouble making the F4 Newtonian work on F2.8 by using the ASA corrector/reducer. This was quite painful, but SharpStar’s corrector is much bigger in diameter, so theoretically it should work.

Immediately as soon it was available, I ordered one at http://www.teleskop-express.de/ but their own rebranded version called TS-Optics hyperbolic astrograph. How does it perform? Let’s have a look.

I somehow expected that reaching the focus will be quite a challenge, therefore I ordered ZWO electronic focuser and easily attached it to SharpStar.

The secondary mirror has very nice spider vanes. This was my dream to get very stiff and perpendicular vanes. I have two Newtonians from TS and it was a bit struggle to get them perfectly perpendicular. On the other hand, the secondary mirror is not flocked/blackened. Moreover, there are many shiny screws. All this can cause some reflections, but we will see.

Secondary
Secondary mirror

The primary mirror’s edge is covered by the ring. I really like this feature and all Newtonians should have it. A cheap solution is to clamp the primary by L-clamps, which cause ugly reflections/flares around the bright stars.

Primary mirror
Primary mirror

The corrector has an M48 male thread, so any 2″ extension can be attached. Included is only an M48 to 1 1/4″ extension, but I already have a couple of 2″ at home and these are not expensive.

M48 to 2" extension and Howie Glatter 2" laser collimator
M48 to 2″ extension and Howie Glatter 2″ laser collimator

The secondary mirror can be collimated even with the corrector attached.

Secondary collimated

But to collimate the primary mirror by a Barlow laser, the corrector must be unscrewed. The tool to do that was included and it was easy to unscrew it.

Primary collimated

First light

I was so excited to test the telescope outside. The spring season provides many deep space objects. All you need is just to point the telescope into the constellation Virgo or Leo and you will find many galaxies anywhere you look. In fact, this was the main reason I purchased this telescope – to have a focal length of around 400 mm and a fully illuminated 44 mm image circle. I don’t have a full-frame cooled camera, so I did the first light with an APS-C sensor size (ZWO ASI 071). The first target was the galaxy M105. After the post-processing, I was very disappointed. The stars in the corners are oval and they have a color shift. The blue channel is shifted towards the center and the red one outwards. See for yourself:

I pushed the saturation and the vibrance to magnify the aberrations. Here is the detailed picture of the corners vs the center:

I think we all agree this is not OK at all. I would not complain if I see such ugly stars on a cheap telescope, but this one was not a cheap one. This test was done on an APS-C sensor, which means a diagonal of 29 mm and not the advertised 44 mm. I immediately contacted TS and asked what the hell is going on. I was told that probably it could be the back focal distance (BFD). It’s the distance from the corrector to the sensor. Typically, it’s 55 mm, but a bit shorter or longer could improve the performance. Fortunately, I have many M48 adapters and distance rings, which could cover the BFD from 58 to 51 mm, so I started the experiment. This time, no stacking, no image calibration by darks or flats. Just a single picture and cropped corner:

I don’t see any significant differences between BFD 53 – 55 mm, subjectively. The stars are still oval and if I would stack many images together, even the color aberration would pop up. Let’s put a subjective assessment aside and let’s use a deterministic method to analyze the data – a CCD inspector. Here is the 55 mm, which is the recommended BFD.

The corners are obviously much worst than the center, but again, it’s an APS-C sensor and not a full frame. I decided to plot the FWHM as a function of the BFD. I evaluated the center and each corner separately. If the telescope would be perfect, I would get the same FWHM value anywhere on the picture. Based on this diagram one can easily find the sweet spot of the back focal distance, which is in this case 55 mm. Things don’t get significantly worst if the BFD is reduced to 54 mm, or even 53 mm. Unfortunately, I didn’t have a 1 mm washer to test 56 mm so this distance remains a mystery.

Conclusions

When I showed the graph to TS they agreed that there is something wrong with this telescope and I had full right to return it. And this is what I exactly did. They didn’t offer me a replacement telescope (I can only guess that the product from the same batch would have the same optical quality). The sample I tested was a good-looking telescope with very poor optical quality. If you are not a pixel peeper, you better get a cheap Newtonian 150/600 mm f4 and you get the same outcome in the corners, maybe even better with a decent coma corrector. I really don’t understand how this can be advertised as a telescope for a full-frame sensor. I asked TS if some customer managed to get this “astrograph” working with a full-frame sensor. They replied that so far non of their customer used this telescope with such a large sensor (APS-C). Ha ha ha. This was a good one, but really this is what they told me. I would really appreciate it if other users have a similar experience as me. Please write me a comment below.